How to Use Liquid Culture for Mushroom Cultivation
A single syringe of liquid culture can inoculate dozens of grain jars in a matter of minutes. This tool is a favorite for fast growth and solid results. It helps beginners find success with their first batch of fungi.
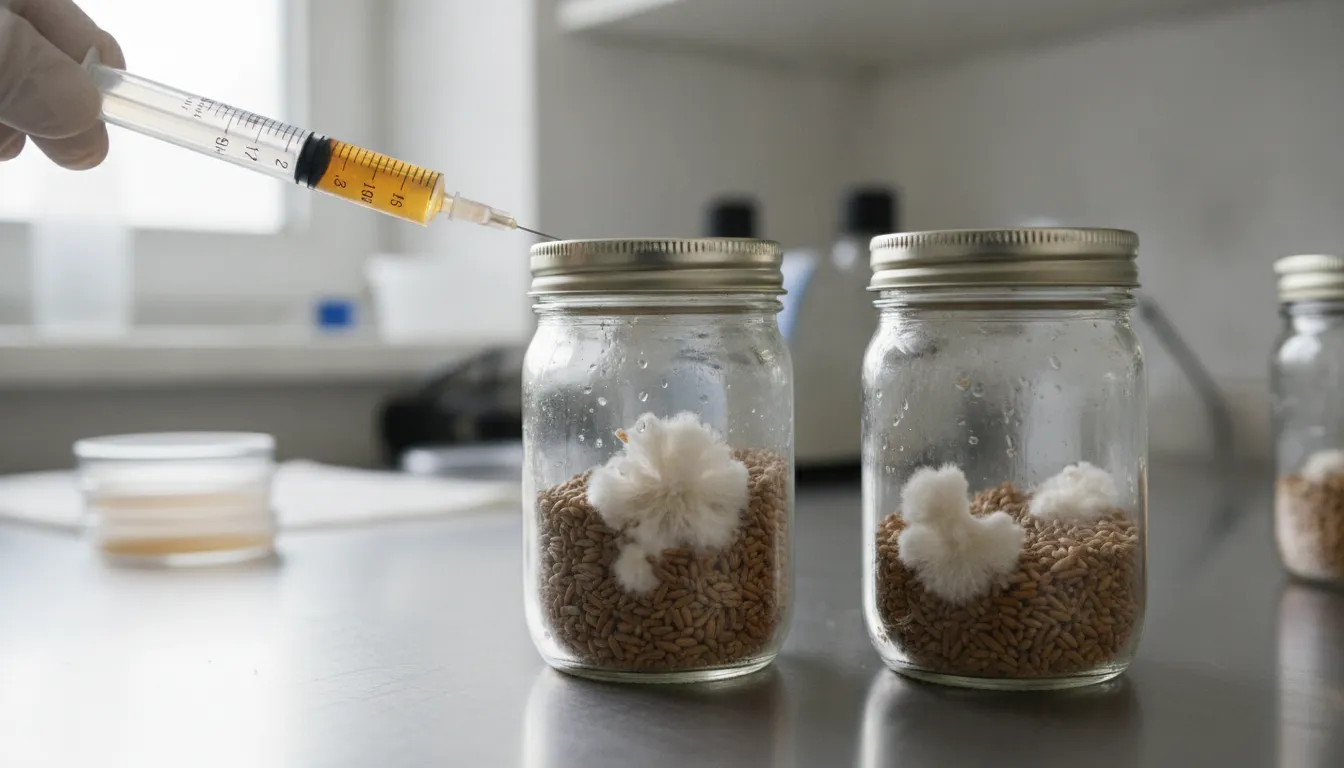
How to use liquid culture involves putting a nutrient broth with live mycelium into a sterile substrate like grain. This work begins in a clean space, as even tiny bits of dust can lead to mold or bacteria. Most growers use a sterile syringe to inject 1-2 ml of liquid. To stay safe, experts at MycoHaus suggest using a still air box to block germs. Once inoculated, keep jars in a dark, warm space between 70 and 90 degrees Fahrenheit. You should see white, fuzzy growth within a few days.
Before you start your first inoculation, you must understand the science behind this watery mix of mycelium. We will start by looking at What is Mushroom Liquid Culture? so you can master this tool. The first step on this path begins with
What is Mushroom Liquid Culture?
Mushroom liquid culture is a sterile nutrient broth that contains living mushroom mycelium. Think of it as a liquid version of grain spawn. At North Spore, we have developed sterile liquid cultures of various mushroom species to ensure growers get clean, active mycelium right out of the syringe. This liquid allows the fungus to grow and expand quickly before you use it. Most growers check our guide to understand the difference between spores and spawn to start the growing process by adding active mycelium to a sterile base.
A pure mycelium mix
Unlike spore syringes, which contain thousands of tiny seeds, liquid culture contains a live clone. This means the fungus has already mated and started to grow. Because the mycelium is already active, it can colonize a grain jar much faster. When you learn about essential mycology techniques, you can read our guide on producing agar plates, slants, and liquid culture to see how to prepare clean cultures at home. Experts suggest that a clean culture should be clear enough to see the white clouds of mycelium inside.
Comparing cultures and spores
Choosing between spores and liquid culture depends on your goals and tools. Spores are great for finding new traits, but they take longer to start. Liquid culture is the top choice for most people who want a fast and reliable harvest. It reduces the time your grain sits idle, which lowers the risk of mold or bacteria taking over. The table below shows the main differences you should know before you start your next project.
Feature.
Spore Syringe.
Liquid Culture.
Contents
Microscopic spores.
Living mycelium clone.
Growth Speed
Slow (needs to mate).
Fast (already growing).
Contam Risk
Higher (untested).
Lower (clean and tested).
Best For
New strains.
Fast harvests.
Standard lab procedures
To keep a culture healthy, labs use high heat for sterilization. Standard rules suggest heating agar and broth to 121 degrees Celsius for at least 15 minutes to kill unwanted germs. According to experts at Penn State University, proper care in these early stages is the best way to prevent later issues in the spawn process. This careful work ensures that every drop you use is pure and ready to grow. You can browse our list of recommended mushroom cultivation tools and equipment to help set up your home laboratory.
Step-by-Step Guide: How to Use Liquid Culture
Using a liquid culture syringe is one of the best ways to start your mushroom growing journey. It is a simple and sure way to add life to your sterile grain jars or bags. For many home growers who use all-in-one bags, following the complete Shroomtek method for growing mushrooms in bags is the top choice because it is fast and easy to do. Whether you are using a North Spore liquid culture syringe or multiplying your own, practicing sterile techniques is key.
This rich broth contains live mushroom mycelium that is ready to grow as soon as it hits the right food source. By doing a few clear steps, you can make sure your mushroom cultures get a strong start without bad germs.
Setting up a clean workspace
Before you begin, you must find a clean spot to work. Clean air is key in mycology. Using a flow hood or a HEPA filter can help clear 99.997 percent of small bits from the air (Penn State, 2024).
If you do not have a flow hood, a still air box is a great tool for home use. Gather your liquid culture tools like alcohol wipes, a lighter, and your sterile grain. Make sure the room is still and free of drafts to keep the air as clean as possible during your work.
Strict clean habits are a must during the whole process. It is not just about being tidy; it is about keeping out tiny life forms that could ruin your crop.
You should wipe down your work surface and all your tools with 70 percent isopropyl alcohol. This small step helps prevent the growth of mold or bacteria. Proper care in these early stages will help you avoid big problems later when you try to make your own mushroom spawn.
Steps for using your syringe
Once your workspace is ready, you can start the task of adding the culture to your grain. This is a quick job, but you must stay focused.
Most people find that using a liquid culture syringe multiplier kit can help them expand their clean cultures indefinitely. You only need a tiny bit of the liquid to see great results in your jars or bags. Follow these steps to use your liquid culture syringe the right way:
Shake the syringe well to break up the mycelium clumps and spread them throughout the broth.
Wipe the injection port of your grain jar or bag with an alcohol pad to remove any surface germs.
Uncap the syringe and use a flame to heat the needle until it glows red to ensure it is fully sterile.
Wait a few seconds for the needle to cool, then push it through the port and inject 1 to 2 ml of the liquid.
Remove the needle slowly and place the cap back on the syringe if you have liquid left for later use.
Store your inoculated grain in a dark spot with a steady heat to let the mycelium grow.
You only need a small amount of liquid for each container. Most 10 ml syringes can inoculate several jars or bags. Using too much liquid can make the grain too wet, which might lead to rot. If you are working with very large bags of substrate, you might need to use a bit more of the liquid to help the growth spread faster.
Care after inoculation
After you finish, you must give your mycelium the right home to grow. The grain needs to stay at a steady heat for the best results.
Most species grow best when the air is between 70 and 90 degrees Fahrenheit. It is also wise to watch your jars often during this phase. Look for white, fuzzy growth that spreads out from where you injected the liquid. This shows that your culture is healthy and active.
Watching your jars helps you find any signs of mold early. Healthy mycelium should look clean and white.
If you see green, black, or slimy spots, those are signs of germs. Keeping your cultures in the right spots reduces the risk of these issues. Good care now leads to a top level product that will give you plenty of fresh mushrooms to enjoy later.
Essential Tools and Sterile Technique for Inoculation
Working with mushroom cultures needs a high level of clean habits. In mycology, being just clean is not enough. You must use a sterile technique to keep away tiny germs like mold and bacteria that float in the air. Using high-quality equipment, like the clean room tools provided by North Spore, can make a significant difference. Proper care during these early steps will help you get a good crop later on and stop problems before they start.
Using a Still Air Box or Flow Hood
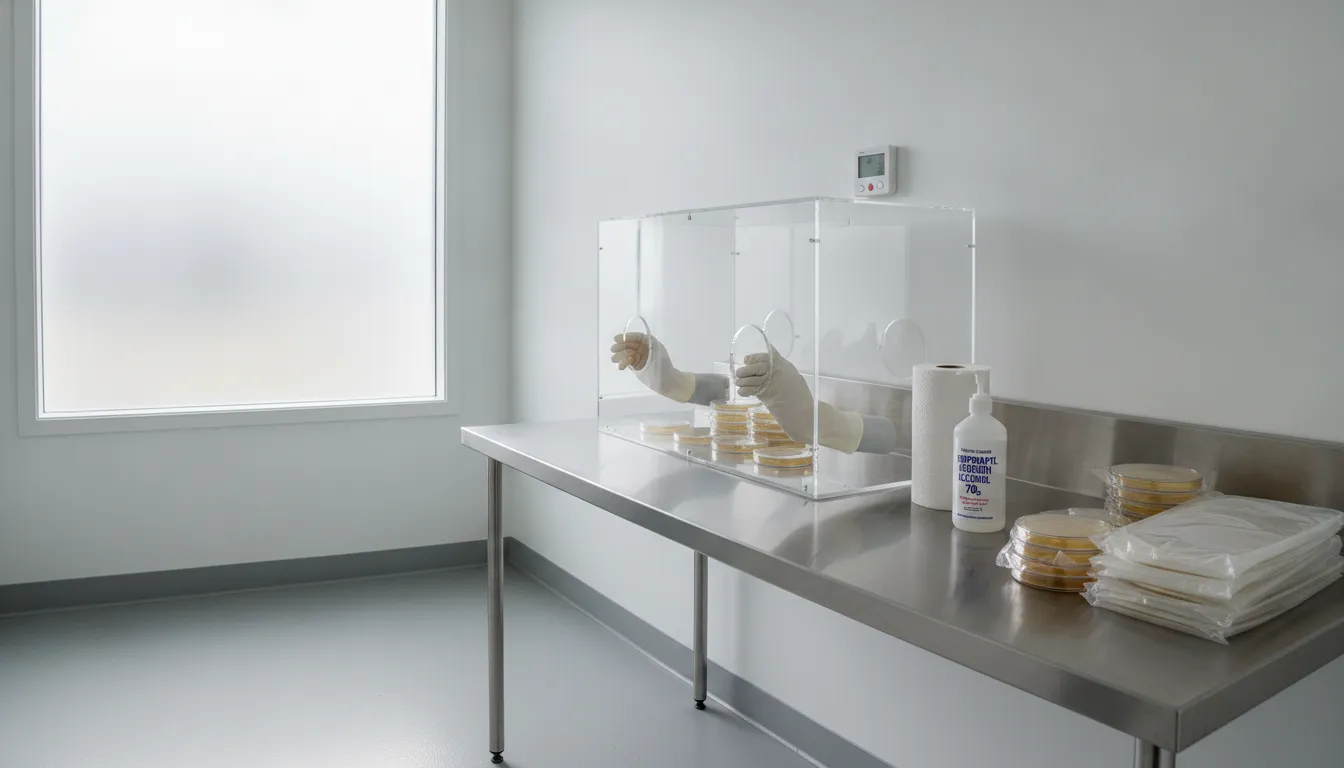
The most common tool for home growers is a still air box. This is a clear plastic bin with two holes for your arms. It stops air from moving while you work, which helps keep dust and germs from falling into your jars. If you want to move up, you can use a laminar flow hood or a HEPA filter. These tools can reduce airborne particles by 99.997 percent. This creates a safe, contaminant-free space when you are inoculating sterile grow bags or Mason jars with your syringe.
Setting up a still air box is an essential part of maintaining sterile technique for mushroom cultivation.
Preparing Your Workspace
Before you start, you must clean every surface in your work area. Use 70% isopropyl alcohol to wipe down your tools and the inside of your box. This type of alcohol works better than 90% because it stays wet longer to kill more germs. You should also wear gloves and a mask to keep your own germs from the air. Making sure your workspace is ready is a key part of choosing your laboratory and cultivation tools and practicing basic lab safety.
Flame Sterilizing the Needle
A vital step in how to use liquid culture is flame sterilization. You must heat the metal needle of your syringe until it glows red. Use a torch or a lighter to do this before each use. This heat kills any living thing on the needle so it is fully sterile. Once it is red hot, let it cool for a few seconds or push out a tiny bit of liquid to cool it down. This ensures you do not burn the mycelium when you put it into your sterile grain.
How Much Liquid Culture Do You Need to Inject?
When you learn the art of inoculating all-in-one grow bags, it is tempting to use a lot of liquid. You might think that more mycelium will lead to faster growth. But using too much liquid is a common mistake that can kill your project. With North Spore's pre-sterilized liquid culture syringes, a tiny dose goes a long way.
For a standard quart jar of grain, you only need to inject 1 to 2 ml of culture. A single 10 ml syringe can inoculate up to ten jars if you use it right. Using a small dose helps keep the grain at the right moisture level. Following proper culture rules during these first steps will help you get a clean, healthy crop.
The 1-2 ml Standard
Learning how to use liquid culture starts with the right dose. The goal of using liquid culture is to spread live mycelium through your grain. A few drops of the broth contain millions of tiny fungal cells. Once these cells touch the grain, they start to eat and grow. For most home growers, 1 to 2 ml is plenty to get the job started.
You do not need to soak the grain to see results. Try to hit two or three different spots in the jar by angling the needle. This creates many growth points at once. When the mycelium starts in many places, it will fill the jar much faster. This simple trick lets you use less liquid while getting the same speed as a large dose.
Dangers of Too Much Liquid
If you inject too much liquid, the extra moisture pools at the bottom of your jar. This creates a wet, airless space known as an anaerobic zone. Fungi need air to breathe and grow. In a soggy jar, the mycelium will slow down or stop growing at all. This gives bad bacteria a chance to take over and ruin the spawn.
Over-injecting often leads to a problem called sour rot. You might notice a slime on the grain or a sharp, sweet smell. This smell is a clear sign that bacteria are winning the race. Once a jar has sour rot, it is hard for the mushroom mycelium to get well. Most of the time, you will have to throw the grain away and start over with a fresh, dry jar.
Bulk Substrate Needs
While small jars only need a tiny dose, larger bags need a bit more. If you are using a five-pound bag of grain, you may need to use 3 to 5 ml. The same rules still apply: you want enough to start growth, but not so much that the bag gets wet. It is much easier to wait a few extra days for growth than to fix a rotten bag. By keeping your grain dry and your dose small, you give your mushrooms the best chance to win.
Optimizing Temperature and Conditions for Mycelium Incubation
After injecting your spores or cultures, as shown in our essential mycology lab skills guide, the real work begins inside the jar. This time is known as the incubation phase. During this stage, the mycelium begins to eat the grain and spread its white threads. You must create a safe space for this to happen.
Our team of mycologists at North Spore recommends keeping your incubating jars in a dedicated, warm, and dark closet. If you want to know how to use liquid culture well, you must master the care of your jars after the shot. The space you choose will decide if your mushrooms grow fast or fail to start at all.
Finding the right heat range
Heat is the main thing for fast growth. Mycelium needs a steady temperature between 70 and 90 degrees Fahrenheit. If the room is too cold, the fungus will go to sleep. This slow pace gives wild molds a chance to take over your grain. On the other hand, high heat can cook the soft threads and kill them. Most growers find that 75 to 78 degrees is the best range for many types like oysters. You should use a simple heat gauge to track the air in your grow room.
Try to avoid big shifts in heat during the day. If your house gets cold at night, the mycelium may struggle to stay active. Many people use small heat mats or space heaters to keep the air steady. Make sure the jars do not sit right on a hot surface. Direct heat can dry out the moisture inside your bags or jars. A steady, warm air flow is much better than a single hot spot. This helps the mycelium stay healthy as it fills the jar.
Choosing a dark and clean spot
Mycelium does not need light to grow at this stage. In the wild, it grows deep inside logs or under the soil. You should find a dark closet or a high shelf where the sun will not hit it. Direct light can raise the heat inside the jar far above the room level. It can also trigger the fungus to grow mushrooms too early. This is bad because you want the grain to be fully white before that happens. Keeping the jars in the dark mimics their natural home.
Keeping things clean is just as vital as darkness. Pick a spot that is free of dust and pet hair. High shelves are often cleaner than the floor because they have less foot traffic. You should also make sure the area is not damp or drafty. Damp air can help mold grow on the outside of your bags. A clean, dry, and dark spot will give your cultures the best chance to thrive. Check your jars once a day to see how the white mycelium moves through the grain.
Monitoring healthy white mycelium growth on grain spawn in a clean, dark incubation environment.
Allowing the culture to breathe
As the mycelium grows, it acts like a living thing. It breathes in oxygen and lets out gases. If these gases get trapped, the growth will slow down and stop. You should never store your jars in air-tight bins or shut boxes. Experts at Penn State University note that trapped gases can stop the fungi from spreading. Instead, place them on an open wire shelf or in a closet with some air flow. This allows fresh air to reach the filter patches on your jars or bags.
Proper air flow also helps keep the heat even around all your jars. If you stack bags too close, they can create their own heat as they grow. This "bio-heat" can sometimes raise the core of the bag by a few degrees. By giving each jar some space, you help that extra heat escape. This keeps everything within the safe range you set. Good air flow, steady heat, and a dark room are the keys to good growth. With these steps, you will see your grain turn white in a few weeks.
Troubleshooting Common Liquid Culture Contamination Signs
Successful mushroom growing depends on the purity of your master culture. At North Spore, we test every batch of our liquid culture syringes for purity, but home inoculation still carries risks. When you are growing mushrooms in bags, you must watch for signs of health or failure. Healthy mycelium is bright white and grows in fuzzy or rope-like strands. The liquid broth should stay clear enough to see these growths as they expand.
Signs of healthy mycelium
Healthy mycelium looks like white clouds floating in the jar. These clouds should be thick and have a clean, mushroom-like smell. When you swirl the jar, the mycelium should stay together in clumps rather than breaking into a fine dust. Monitoring these early phases helps you understand how mushroom spawn differs from spores in your workflow and ensures a reliable end product. According to researchers at Penn State University, proper culture management reduces the risk of later problems in the spawn process.
How to spot contamination
Contamination often shows up as color changes or cloudiness in the broth. If the liquid looks milky or murky, bacteria may be growing. Molds can appear as green, pink, or black spots on the surface or within the mycelium itself. A foul or sour smell is a clear sign that the jar is bad. Because fungi can produce gases that slow their own growth, you should not keep cultures in closed containers for too long. If you see signs of mold or bacteria, you must discard the jar safely to prevent spreading spores to your clean space.
Testing for purity
It is best to test your liquid culture on agar plates before you use it to inoculate grain. This step lets you see if any hidden microbes are present. You should observe these agar cultures for 2 to 4 weeks to check for stability and uniform growth. If the agar shows clean white growth with no off-colors, your culture is ready for use. Following strict sterile rules is the best way to avoid these issues. Using high-quality mushroom growing supplies like flow hoods can help you keep your work area clean.
Frequently Asked Questions
How do you store a liquid culture syringe safely?
Store your liquid culture syringe in a clean, cool place. A fridge is the best spot for long-term storage. Keep the syringe between 35 and 45 degrees Fahrenheit. This slow pace keeps the mycelium alive but stops it from growing too fast. Always make sure the cap is on tight to keep out germs. According to Penn State University, proper care at the start helps avoid big problems later.
How do you inoculate an agar plate with liquid culture?
To use liquid culture on agar, first clean your workspace well. Use a flame to get the needle red hot so it is sterile. Let it cool for a few seconds. Squirt just one or two drops of the liquid onto the center of the agar plate. Close the lid fast and seal it with tape. This helps you check if the culture is clean. Lab experts at Penn State University say watching these plates for two to four weeks ensures they are stable.
Can you use clean drinking water to make liquid culture?
Yes, you can use clean drinking water to make a liquid broth for mushrooms. While distilled water is the best choice for a clean start, tap water that is safe to drink can also work. You will still need to add nutrients like honey or malt to the water. Boil or pressure cook the mix to kill any tiny bugs. As noted by Mycology Simplified, most growers like a mix that is not too thick with nutrients.
How long does it take for liquid culture to colonize grain?
Liquid culture usually takes five to ten days to show growth on grain. The full jar or bag may be done in two to three weeks. This is much faster than using spores. Fast growth helps the mushroom mycelium beat out molds. Keep the jars in a dark spot at a steady heat. According to experts at MycoHaus, keeping the room between 70 and 90 degrees is key for the best results.
Ready to find the right liquid culture for your project?
Waiting to start your next grow leads to missed harvests and lost time in your own growing and lab space. If you do not use clean cultures, you risk contamination that can ruin weeks of your hard work and waste your growing budget. Starting now with the right home cultivation gear ensures your mycelium stays healthy and grows fast so you can see your results much sooner. You can set yourself up for a very smooth and successful growing cycle by choosing to start your work today.
A single syringe of liquid culture can inoculate dozens of grain jars in a matter of minutes. This tool is a favorite for fast growth and solid results. It helps beginners find success with their first batch of fungi.
How to use liquid culture involves putting a nutrient broth with live mycelium into a sterile substrate like grain. This work begins in a clean space, as even tiny bits of dust can lead to mold or bacteria. Most growers use a sterile syringe to inject 1-2 ml of liquid. To stay safe, experts at MycoHaus suggest using a still air box to block germs. Once inoculated, keep jars in a dark, warm space between 70 and 90 degrees Fahrenheit. You should see white, fuzzy growth within a few days.
Before you start your first inoculation, you must understand the science behind this watery mix of mycelium. We will start by looking at What is Mushroom Liquid Culture? so you can master this tool. The first step on this path begins with
What is Mushroom Liquid Culture?
Mushroom liquid culture is a sterile nutrient broth that contains living mushroom mycelium. Think of it as a liquid version of grain spawn. At North Spore, we have developed sterile liquid cultures of various mushroom species to ensure growers get clean, active mycelium right out of the syringe. This liquid allows the fungus to grow and expand quickly before you use it. Most growers check our guide to understand the difference between spores and spawn to start the growing process by adding active mycelium to a sterile base.
A pure mycelium mix
Unlike spore syringes, which contain thousands of tiny seeds, liquid culture contains a live clone. This means the fungus has already mated and started to grow. Because the mycelium is already active, it can colonize a grain jar much faster. When you learn about essential mycology techniques, you can read our guide on producing agar plates, slants, and liquid culture to see how to prepare clean cultures at home. Experts suggest that a clean culture should be clear enough to see the white clouds of mycelium inside.
Comparing cultures and spores
Choosing between spores and liquid culture depends on your goals and tools. Spores are great for finding new traits, but they take longer to start. Liquid culture is the top choice for most people who want a fast and reliable harvest. It reduces the time your grain sits idle, which lowers the risk of mold or bacteria taking over. The table below shows the main differences you should know before you start your next project.
Feature.
Spore Syringe.
Liquid Culture.
Contents
Microscopic spores.
Living mycelium clone.
Growth Speed
Slow (needs to mate).
Fast (already growing).
Contam Risk
Higher (untested).
Lower (clean and tested).
Best For
New strains.
Fast harvests.
Standard lab procedures
To keep a culture healthy, labs use high heat for sterilization. Standard rules suggest heating agar and broth to 121 degrees Celsius for at least 15 minutes to kill unwanted germs. According to experts at Penn State University, proper care in these early stages is the best way to prevent later issues in the spawn process. This careful work ensures that every drop you use is pure and ready to grow. You can browse our list of recommended mushroom cultivation tools and equipment to help set up your home laboratory.
Step-by-Step Guide: How to Use Liquid Culture
Using a liquid culture syringe is one of the best ways to start your mushroom growing journey. It is a simple and sure way to add life to your sterile grain jars or bags. For many home growers who use all-in-one bags, following the complete Shroomtek method for growing mushrooms in bags is the top choice because it is fast and easy to do. Whether you are using a North Spore liquid culture syringe or multiplying your own, practicing sterile techniques is key.
This rich broth contains live mushroom mycelium that is ready to grow as soon as it hits the right food source. By doing a few clear steps, you can make sure your mushroom cultures get a strong start without bad germs.
Setting up a clean workspace
Before you begin, you must find a clean spot to work. Clean air is key in mycology. Using a flow hood or a HEPA filter can help clear 99.997 percent of small bits from the air (Penn State, 2024).
If you do not have a flow hood, a still air box is a great tool for home use. Gather your liquid culture tools like alcohol wipes, a lighter, and your sterile grain. Make sure the room is still and free of drafts to keep the air as clean as possible during your work.
Strict clean habits are a must during the whole process. It is not just about being tidy; it is about keeping out tiny life forms that could ruin your crop.
You should wipe down your work surface and all your tools with 70 percent isopropyl alcohol. This small step helps prevent the growth of mold or bacteria. Proper care in these early stages will help you avoid big problems later when you try to make your own mushroom spawn.
Steps for using your syringe
Once your workspace is ready, you can start the task of adding the culture to your grain. This is a quick job, but you must stay focused.
Most people find that using a liquid culture syringe multiplier kit can help them expand their clean cultures indefinitely. You only need a tiny bit of the liquid to see great results in your jars or bags. Follow these steps to use your liquid culture syringe the right way:
Shake the syringe well to break up the mycelium clumps and spread them throughout the broth.
Wipe the injection port of your grain jar or bag with an alcohol pad to remove any surface germs.
Uncap the syringe and use a flame to heat the needle until it glows red to ensure it is fully sterile.
Wait a few seconds for the needle to cool, then push it through the port and inject 1 to 2 ml of the liquid.
Remove the needle slowly and place the cap back on the syringe if you have liquid left for later use.
Store your inoculated grain in a dark spot with a steady heat to let the mycelium grow.
You only need a small amount of liquid for each container. Most 10 ml syringes can inoculate several jars or bags. Using too much liquid can make the grain too wet, which might lead to rot. If you are working with very large bags of substrate, you might need to use a bit more of the liquid to help the growth spread faster.
Care after inoculation
After you finish, you must give your mycelium the right home to grow. The grain needs to stay at a steady heat for the best results.
Most species grow best when the air is between 70 and 90 degrees Fahrenheit. It is also wise to watch your jars often during this phase. Look for white, fuzzy growth that spreads out from where you injected the liquid. This shows that your culture is healthy and active.
Watching your jars helps you find any signs of mold early. Healthy mycelium should look clean and white.
If you see green, black, or slimy spots, those are signs of germs. Keeping your cultures in the right spots reduces the risk of these issues. Good care now leads to a top level product that will give you plenty of fresh mushrooms to enjoy later.
Essential Tools and Sterile Technique for Inoculation
Working with mushroom cultures needs a high level of clean habits. In mycology, being just clean is not enough. You must use a sterile technique to keep away tiny germs like mold and bacteria that float in the air. Using high-quality equipment, like the clean room tools provided by North Spore, can make a significant difference. Proper care during these early steps will help you get a good crop later on and stop problems before they start.
Using a Still Air Box or Flow Hood
The most common tool for home growers is a still air box. This is a clear plastic bin with two holes for your arms. It stops air from moving while you work, which helps keep dust and germs from falling into your jars. If you want to move up, you can use a laminar flow hood or a HEPA filter. These tools can reduce airborne particles by 99.997 percent. This creates a safe, contaminant-free space when you are inoculating sterile grow bags or Mason jars with your syringe.
Setting up a still air box is an essential part of maintaining sterile technique for mushroom cultivation.
Preparing Your Workspace
Before you start, you must clean every surface in your work area. Use 70% isopropyl alcohol to wipe down your tools and the inside of your box. This type of alcohol works better than 90% because it stays wet longer to kill more germs. You should also wear gloves and a mask to keep your own germs from the air. Making sure your workspace is ready is a key part of choosing your laboratory and cultivation tools and practicing basic lab safety.
Flame Sterilizing the Needle
A vital step in how to use liquid culture is flame sterilization. You must heat the metal needle of your syringe until it glows red. Use a torch or a lighter to do this before each use. This heat kills any living thing on the needle so it is fully sterile. Once it is red hot, let it cool for a few seconds or push out a tiny bit of liquid to cool it down. This ensures you do not burn the mycelium when you put it into your sterile grain.
How Much Liquid Culture Do You Need to Inject?
When you learn the art of inoculating all-in-one grow bags, it is tempting to use a lot of liquid. You might think that more mycelium will lead to faster growth. But using too much liquid is a common mistake that can kill your project. With North Spore's pre-sterilized liquid culture syringes, a tiny dose goes a long way.
For a standard quart jar of grain, you only need to inject 1 to 2 ml of culture. A single 10 ml syringe can inoculate up to ten jars if you use it right. Using a small dose helps keep the grain at the right moisture level. Following proper culture rules during these first steps will help you get a clean, healthy crop.
The 1-2 ml Standard
Learning how to use liquid culture starts with the right dose. The goal of using liquid culture is to spread live mycelium through your grain. A few drops of the broth contain millions of tiny fungal cells. Once these cells touch the grain, they start to eat and grow. For most home growers, 1 to 2 ml is plenty to get the job started.
You do not need to soak the grain to see results. Try to hit two or three different spots in the jar by angling the needle. This creates many growth points at once. When the mycelium starts in many places, it will fill the jar much faster. This simple trick lets you use less liquid while getting the same speed as a large dose.
Dangers of Too Much Liquid
If you inject too much liquid, the extra moisture pools at the bottom of your jar. This creates a wet, airless space known as an anaerobic zone. Fungi need air to breathe and grow. In a soggy jar, the mycelium will slow down or stop growing at all. This gives bad bacteria a chance to take over and ruin the spawn.
Over-injecting often leads to a problem called sour rot. You might notice a slime on the grain or a sharp, sweet smell. This smell is a clear sign that bacteria are winning the race. Once a jar has sour rot, it is hard for the mushroom mycelium to get well. Most of the time, you will have to throw the grain away and start over with a fresh, dry jar.
Bulk Substrate Needs
While small jars only need a tiny dose, larger bags need a bit more. If you are using a five-pound bag of grain, you may need to use 3 to 5 ml. The same rules still apply: you want enough to start growth, but not so much that the bag gets wet. It is much easier to wait a few extra days for growth than to fix a rotten bag. By keeping your grain dry and your dose small, you give your mushrooms the best chance to win.
Optimizing Temperature and Conditions for Mycelium Incubation
After injecting your spores or cultures, as shown in our essential mycology lab skills guide, the real work begins inside the jar. This time is known as the incubation phase. During this stage, the mycelium begins to eat the grain and spread its white threads. You must create a safe space for this to happen.
Our team of mycologists at North Spore recommends keeping your incubating jars in a dedicated, warm, and dark closet. If you want to know how to use liquid culture well, you must master the care of your jars after the shot. The space you choose will decide if your mushrooms grow fast or fail to start at all.
Finding the right heat range
Heat is the main thing for fast growth. Mycelium needs a steady temperature between 70 and 90 degrees Fahrenheit. If the room is too cold, the fungus will go to sleep. This slow pace gives wild molds a chance to take over your grain. On the other hand, high heat can cook the soft threads and kill them. Most growers find that 75 to 78 degrees is the best range for many types like oysters. You should use a simple heat gauge to track the air in your grow room.
Try to avoid big shifts in heat during the day. If your house gets cold at night, the mycelium may struggle to stay active. Many people use small heat mats or space heaters to keep the air steady. Make sure the jars do not sit right on a hot surface. Direct heat can dry out the moisture inside your bags or jars. A steady, warm air flow is much better than a single hot spot. This helps the mycelium stay healthy as it fills the jar.
Choosing a dark and clean spot
Mycelium does not need light to grow at this stage. In the wild, it grows deep inside logs or under the soil. You should find a dark closet or a high shelf where the sun will not hit it. Direct light can raise the heat inside the jar far above the room level. It can also trigger the fungus to grow mushrooms too early. This is bad because you want the grain to be fully white before that happens. Keeping the jars in the dark mimics their natural home.
Keeping things clean is just as vital as darkness. Pick a spot that is free of dust and pet hair. High shelves are often cleaner than the floor because they have less foot traffic. You should also make sure the area is not damp or drafty. Damp air can help mold grow on the outside of your bags. A clean, dry, and dark spot will give your cultures the best chance to thrive. Check your jars once a day to see how the white mycelium moves through the grain.
Monitoring healthy white mycelium growth on grain spawn in a clean, dark incubation environment.
Allowing the culture to breathe
As the mycelium grows, it acts like a living thing. It breathes in oxygen and lets out gases. If these gases get trapped, the growth will slow down and stop. You should never store your jars in air-tight bins or shut boxes. Experts at Penn State University note that trapped gases can stop the fungi from spreading. Instead, place them on an open wire shelf or in a closet with some air flow. This allows fresh air to reach the filter patches on your jars or bags.
Proper air flow also helps keep the heat even around all your jars. If you stack bags too close, they can create their own heat as they grow. This "bio-heat" can sometimes raise the core of the bag by a few degrees. By giving each jar some space, you help that extra heat escape. This keeps everything within the safe range you set. Good air flow, steady heat, and a dark room are the keys to good growth. With these steps, you will see your grain turn white in a few weeks.
Troubleshooting Common Liquid Culture Contamination Signs
Successful mushroom growing depends on the purity of your master culture. At North Spore, we test every batch of our liquid culture syringes for purity, but home inoculation still carries risks. When you are growing mushrooms in bags, you must watch for signs of health or failure. Healthy mycelium is bright white and grows in fuzzy or rope-like strands. The liquid broth should stay clear enough to see these growths as they expand.
Signs of healthy mycelium
Healthy mycelium looks like white clouds floating in the jar. These clouds should be thick and have a clean, mushroom-like smell. When you swirl the jar, the mycelium should stay together in clumps rather than breaking into a fine dust. Monitoring these early phases helps you understand how mushroom spawn differs from spores in your workflow and ensures a reliable end product. According to researchers at Penn State University, proper culture management reduces the risk of later problems in the spawn process.
How to spot contamination
Contamination often shows up as color changes or cloudiness in the broth. If the liquid looks milky or murky, bacteria may be growing. Molds can appear as green, pink, or black spots on the surface or within the mycelium itself. A foul or sour smell is a clear sign that the jar is bad. Because fungi can produce gases that slow their own growth, you should not keep cultures in closed containers for too long. If you see signs of mold or bacteria, you must discard the jar safely to prevent spreading spores to your clean space.
Testing for purity
It is best to test your liquid culture on agar plates before you use it to inoculate grain. This step lets you see if any hidden microbes are present. You should observe these agar cultures for 2 to 4 weeks to check for stability and uniform growth. If the agar shows clean white growth with no off-colors, your culture is ready for use. Following strict sterile rules is the best way to avoid these issues. Using high-quality mushroom growing supplies like flow hoods can help you keep your work area clean.
Frequently Asked Questions
How do you store a liquid culture syringe safely?
Store your liquid culture syringe in a clean, cool place. A fridge is the best spot for long-term storage. Keep the syringe between 35 and 45 degrees Fahrenheit. This slow pace keeps the mycelium alive but stops it from growing too fast. Always make sure the cap is on tight to keep out germs. According to Penn State University, proper care at the start helps avoid big problems later.
How do you inoculate an agar plate with liquid culture?
To use liquid culture on agar, first clean your workspace well. Use a flame to get the needle red hot so it is sterile. Let it cool for a few seconds. Squirt just one or two drops of the liquid onto the center of the agar plate. Close the lid fast and seal it with tape. This helps you check if the culture is clean. Lab experts at Penn State University say watching these plates for two to four weeks ensures they are stable.
Can you use clean drinking water to make liquid culture?
Yes, you can use clean drinking water to make a liquid broth for mushrooms. While distilled water is the best choice for a clean start, tap water that is safe to drink can also work. You will still need to add nutrients like honey or malt to the water. Boil or pressure cook the mix to kill any tiny bugs. As noted by Mycology Simplified, most growers like a mix that is not too thick with nutrients.
How long does it take for liquid culture to colonize grain?
Liquid culture usually takes five to ten days to show growth on grain. The full jar or bag may be done in two to three weeks. This is much faster than using spores. Fast growth helps the mushroom mycelium beat out molds. Keep the jars in a dark spot at a steady heat. According to experts at MycoHaus, keeping the room between 70 and 90 degrees is key for the best results.
Ready to find the right liquid culture for your project?
Waiting to start your next grow leads to missed harvests and lost time in your own growing and lab space. If you do not use clean cultures, you risk contamination that can ruin weeks of your hard work and waste your growing budget. Starting now with the right home cultivation gear ensures your mycelium stays healthy and grows fast so you can see your results much sooner. You can set yourself up for a very smooth and successful growing cycle by choosing to start your work today.